Shader Effects
Special shader effects are crucial to create breathtaking visual effects, in movies as well as in games.
We are not quite there yet, obviously, but in this quick tutorial we will write two simple shader effects to get used to the High-Level Shading language.
Creating a Triangle
To create a triangle, remember that we need a buffer to hold the vertices:
class DirectXGame : core::DirectXApp{private:  Microsoft::WRL::ComPtr<ID3D11Buffer> vertexBuffer;
public:  ...};
The triangle (a small triangle with the top vertex being yellow, the bottom left being green and the bottom right being red) and buffer are initialized in the initGraphics() method:
util::Expected<void> DirectXGame::initGraphics(){  // create a triangle  graphics::VERTEX triangleVertices[] = { { 0.0f, 0.1f, 0.3f, 1.0f, 1.0f, 0.0f },                      { 0.11f, -0.1f, 0.3f, 1.0f, 0.0f, 0.0f },                      { -0.11f, -0.1f, 0.3f, 0.0f, 1.0f, 0.0f } };
  // set up buffer description  D3D11_BUFFER_DESC bd;  bd.ByteWidth = sizeof(graphics::VERTEX) * ARRAYSIZE(triangleVertices);  bd.Usage = D3D11_USAGE_DEFAULT;  bd.BindFlags = D3D11_BIND_VERTEX_BUFFER;  bd.CPUAccessFlags = 0;  bd.MiscFlags = 0;  bd.StructureByteStride = 0;
  // define subresource data  D3D11_SUBRESOURCE_DATA srd = { triangleVertices, 0,0 };
  // create the vertex buffer  if (FAILED(d3d->dev->CreateBuffer(&bd, &srd, &vertexBuffer)))    return "Critical Error: Unable to create vertex buffer!";
  // return success  return {};}
And to draw the triangle, we obviously have to change the render() function:
util::Expected<int> DirectXGame::render(double /*farSeer*/){  // clear the back buffer and the depth/stencil buffer  d3d->clearBuffers();
  // render
  // print FPS information  if (!d2d->printFPS().wasSuccessful())    return std::runtime_error("Failed to print FPS information!");
  // set the vertex buffer  unsigned int stride = sizeof(graphics::VERTEX);  unsigned int offset = 0;  d3d->devCon->IASetVertexBuffers(0, 1, vertexBuffer.GetAddressOf(), &stride, &offset);
  // set primitive topology  d3d->devCon->IASetPrimitiveTopology(D3D11_PRIMITIVE_TOPOLOGY_TRIANGLELIST);
  // draw 3 vertices, starting from vertex 0  d3d->devCon->Draw(3, 0);
  // present the scene  if (!d3d->present().wasSuccessful())    return std::runtime_error("Failed to present the scene!");
  // return success  return 0;}
Using the standard shader from the previous tutorials, we get the following image:
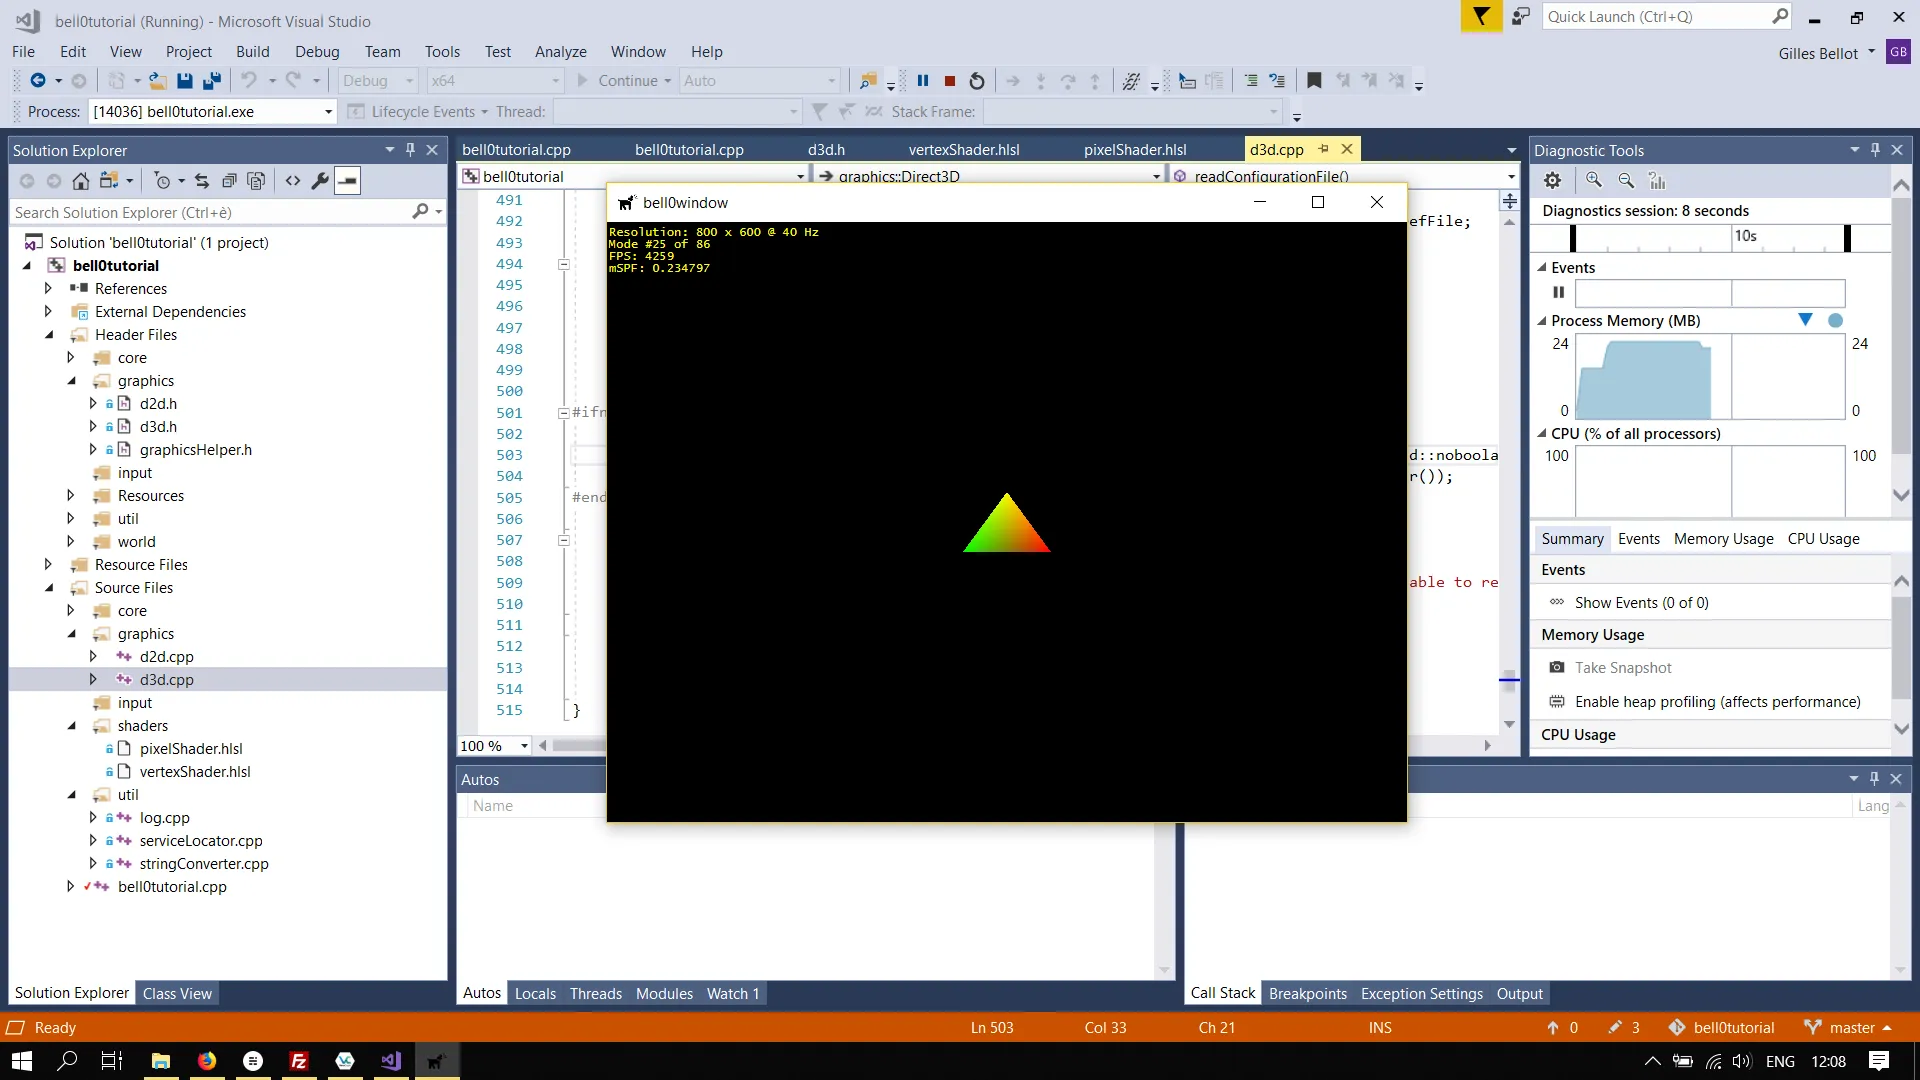
Note that in the rasterizer stage, the colours of each pixel on the screen are interpolated from the colours of the three vertices of the triangle.
Inverting Colours
As a first effect, we will invert the colours of each vertex. To do that, the vertex shaders sets the colour of each vertex to 1.0f (maximal value) minus the actual vertex colour:
struct VertexOut{  float4 position : SV_POSITION;  float4 colour : COLOR;};
VertexOut main(float3 pos : POSITION, float3 col : COLOR){  // create a VertexOut structure  VertexOut vertexOutput;
  // transform the position into homogeneous coordinates (projective geometry)  float4 outputPos = { pos.x, pos.y, pos.z, 1.0f };  vertexOutput.position = outputPos;
  // set the colour (set full alpha)  float4 outputCol = { 1.0f-col.r, 1.0f-col.g, 1.0f-col.b, 1.0f };  vertexOutput.colour = outputCol;
  // return position  return vertexOutput;}
The same effect could be achieved by inverting the colours of each pixel, but obviously that is a lot more work than simply changing three vertices:
float4 main(float4 pos : SV_POSITION, float4 col : COLOR) : SV_TARGET{  col.r = 1.0f - col.r;  col.g = 1.0f - col.g;  col.b = 1.0f - col.b;  col.a = 1.0f - col.a;
  return col;}
Cold Colours
Colours are divided into what are called warm and cold colors, the yellow and red being termed warm, and the blue cold. Thus, an easy way to produce cold colours, is to maximize the value of blue for each vertex colour (shudders):
struct VertexOut{  float4 position : SV_POSITION;  float4 colour : COLOR;};
VertexOut main(float3 pos : POSITION, float3 col : COLOR){  // create a VertexOut structure  VertexOut vertexOutput;
  // transform the position into homogeneous coordinates (projective geometry)  float4 outputPos = { pos.x, pos.y, pos.z, 1.0f };  vertexOutput.position = outputPos;
  // set the colour (set full alpha)  float4 outputCol = { col.r, col.g, 1.0f, 1.0f };  vertexOutput.colour = outputCol;
  // return position  return vertexOutput;}
Okay, enough about colours! What about positioning?
Big Fat Triangles
If triangles eat too much, they get fat, just like humans. This is called scaling and can be achieved by simply multiplying the x and y-coordinates of each vertex by a number bigger than 1:
struct VertexOut{  float4 position : SV_POSITION;  float4 colour : COLOR;};
VertexOut main(float3 pos : POSITION, float3 col : COLOR){  // create a VertexOut structure  VertexOut vertexOutput;
  // transform the position into homogeneous coordinates (projective geometry)  float4 outputPos = { pos.x, pos.y, pos.z, 1.0f };  outputPos.xy *= 5.0f; // scaling  vertexOutput.position = outputPos;
  // set the colour (set full alpha)  float4 outputCol = { col.r, col.g, col.b, 1.0f };  vertexOutput.colour = outputCol;
  // return position  return vertexOutput;}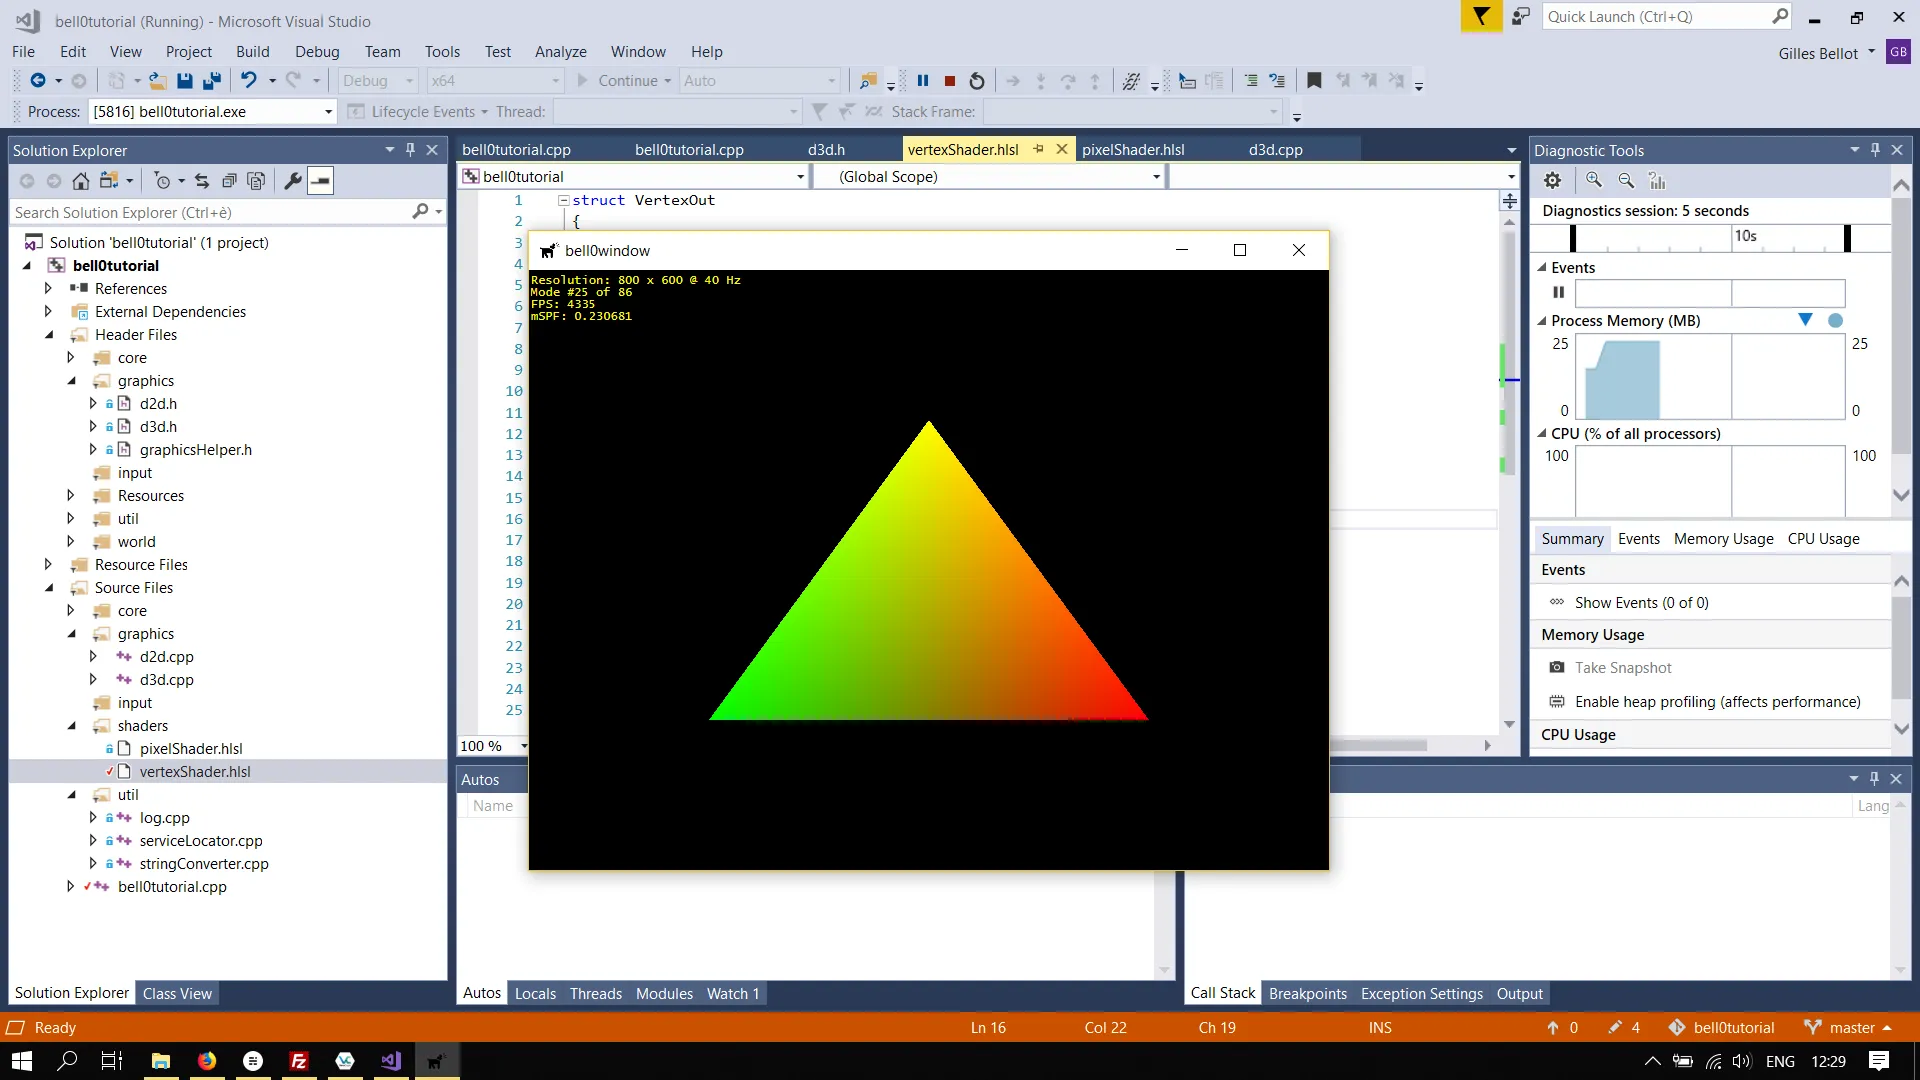
To shrink triangles, it is enough to simply multiply the x and y-coordinates by a number smaller than 1.
Obviously those effects can also be combined, this is a fat triangle with inverted colours:
struct VertexOut{  float4 position : SV_POSITION;  float4 colour : COLOR;};
VertexOut main(float3 pos : POSITION, float3 col : COLOR){  // create a VertexOut structure  VertexOut vertexOutput;
  // transform the position into homogeneous coordinates (projective geometry)  float4 outputPos = { pos.x, pos.y, pos.z, 1.0f };  outputPos.xy *= 5.0f; // scaling  vertexOutput.position = outputPos;
  // set the colour (set full alpha)  float4 outputCol = { col.r, col.g, col.b, 1.0f };  vertexOutput.colour = 1.0f - outputCol; // invert the colours
  // return position  return vertexOutput;}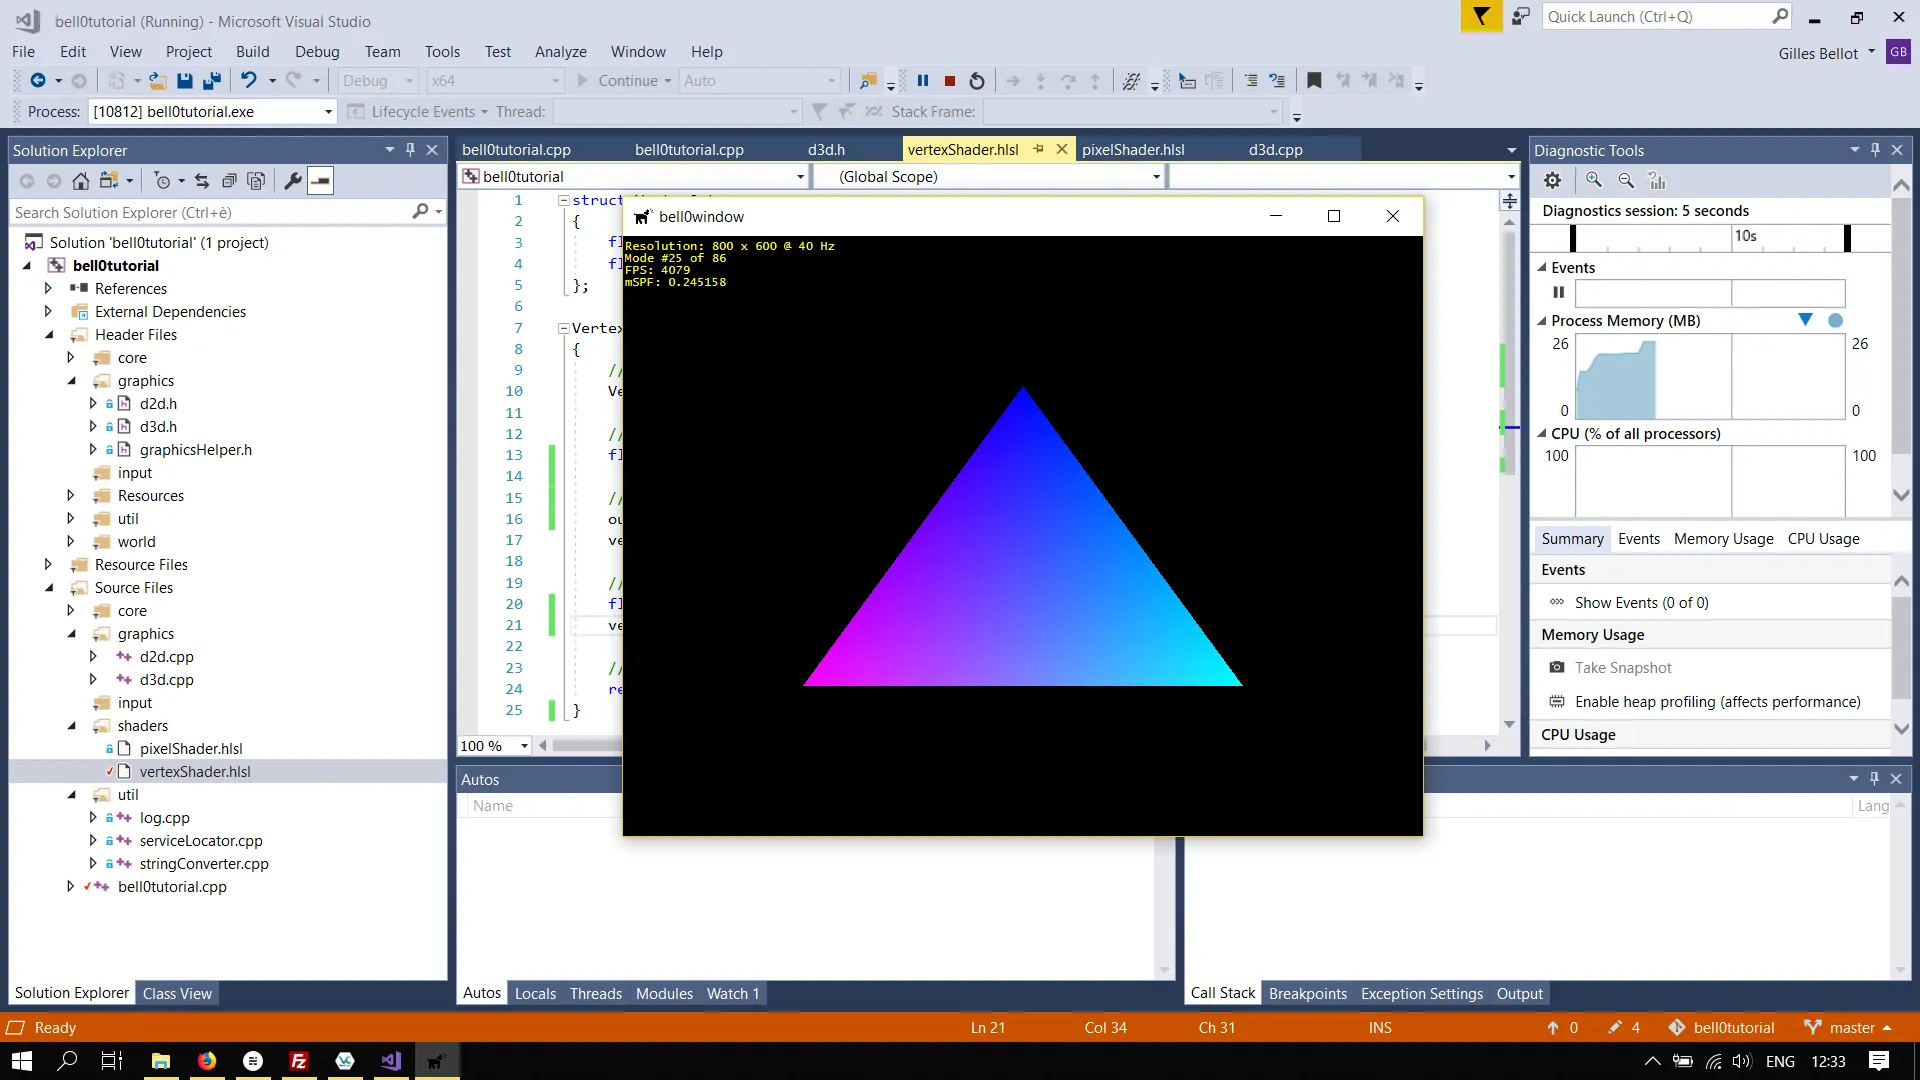
Now, that wasn’t difficult at all! In the next tutorial, we will review our knowledge of constant buffers, i.e. the manipulation of shader data.
References
- Microsoft Developer Network (MSDN)
- Wikipedia